

Queen Charlotte Track: Everything you Need to Plan your Trip
I hiked the extraordinary Queen Charlotte Track in full a few months ago it was definitely one of the highlights of my year! Over 5 days, I just soaked it all in. In this article, the second part of my Queen Charlotte Track posts, I’ll tell you all about my adventure including my full itinerary, costs, accommodation, and my own views about the experience.
In this guide you’ll find:
- How to get ready for the hike from Picton.
- How to get the water taxi to the beginning of the hike and the Queen Charlotte Track Pass.
- My full itinerary including all the campsites I stayed at.
- Full disclosure of the costs involved in hiking the Queen Charlotte Track.
Last week, I tackled the most frequently asked questions about this multi-day hike in the northern part of the South Island of New Zealand. If there’s something that always confuses me when I’m planning an overnight hike, it’s where to start, how to get there, where to sleep and so on. And that’s because there are different combinations to suit most travellers. In this case, you can make it a one day hike, bring your mountain bike and do it in two days, etc.
If you are planning your trip to New Zealand, you definitely need to read the full travelers guide I posted on TGC a few months ago.

But today I’ll focus on my personal experience hiking with no more rush other than running away from the sandflies (ugh! I hate sandflies!)
From my own research before the hike and from chatting to other hikers, it seems that most people do this hike over three days/ night. However, because this was my first holiday as a freelancer I really wanted to savour my time and enjoy the gorgeous landscapes.
Getting ready for the hike in Picton
I arrived in Picton two days before I was planning to start my hike. I had some pre-hike things to sort out like booking the water taxi and buying the Queen Charlotte Track Pass (because some sections of the hike go through private land).
After a five hour ride with awesome views (that I couldn’t enjoy because I felt like puking all the time *sadface*). I got to the hostel (‘The Villa’ in Picton) which is located right in town and just a few hundred metres from the bus stop and super-close to the beach. I loved the hostel because it was cosy and offered free apple crumble every night!
Getting the water taxi and Queen Charlotte Track pass
The day after arriving in Picton, I walked to the I-site (New Zealand’s information sites). From there, I booked the Beachcomber water taxi (from Picton to Ship Cove, return), and purchased the Queen Charlotte Track Pass. Too easy!
The cost of the water taxi was NZ$119 return (updated 2024). Alternatively, it’s NZ$81 for the one way option.
The cost of the Queen Charlotte Track Pass was $30 (updated 2024) for the multi-day option. People sometimes question the cost of the pass, but it traverses private land in some sections, so that covers access fees.
The following day I took the one-hour water taxi to the starting point of the hike at Ship Cove/ Meretoto. And so it began…!

Queen Charlotte Track – Day 1: Ship Cove to Miners Camp (Endeavour Inlet) – 15km / 5.5hrs
The water taxi arrived at Ship Cove at around 10am. This is a historic site so it’s worth spending some time here to learn all about it – and to prepare for what’s to come: a steep climb! (Actually, it looks worse than it is.)
I’ve talked about the start of the hike with fellow trampers and some said that they were a bit wary because they didn’t know how steep it was going to be. Honestly, though, if you just take your time (there are no prizes!) and walk at your own pace, it will be fine. It wasn’t nearly as tough as I had expected it to be. And you do feel a great sense of accomplishment at the top!
I had lunch at the top with a lovely woman I met along the way, then set off again on my own.
Queen Charlotte Track Accommodation Info
The first campsite is only about 2 hours’ hike from Ship Cove, making it a great place to stay for people who want to ease into the hike.
There are various campsites/ cabins/ farmstays/ resorts along the route for you to choose from, depending on how long you want to hike each day.
Getting to Miners Camp
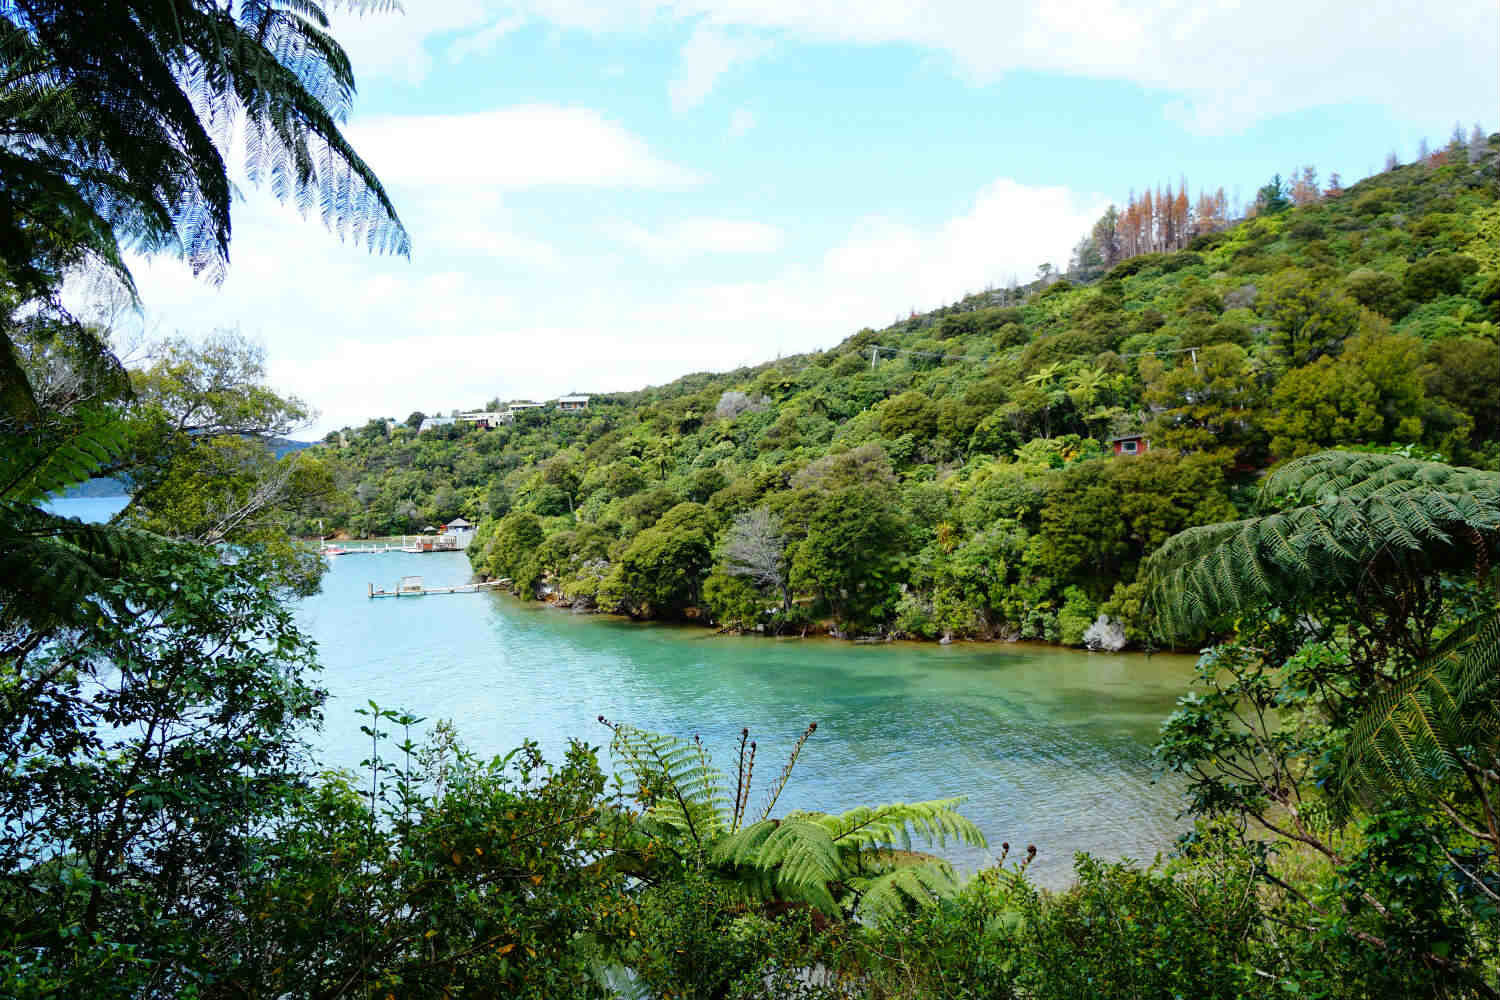
I kept going as I wanted to spend the night at Miners Camp, which is a privately owned campsite at Endeavour Inlet. Miners Camp is located at the far end of Endeavour Inlet – about 20 minutes walk to Furneaux, and about 3 hours to Punga. Once the gorgeous beaches come into view, keep hiking for another 30 minutes and you’ll find it.
(NOTE: There are no Department of Conservation (DoC) campsites at this stage of the Queen Charlotte Track.)
The site is run by a lovely couple. They said that the previous owner was an Italian guy who had planted lots of different types of fruit trees. The trees added such beauty to the area! Accommodation at Miners Camp cost me NZ$15 (about $ 10 USD). I think it’s a bit more over the summer/ peak season. In any case, it was worth it and cheaper compared to the other options!

Queen Charlotte Track – Day 2: From Miners Camp to Camp Bay DoC Campsite – 11.5km / 3hrs
After rain that seemingly lasted all night (big thumbs up to my tent-setting skills because I didn’t get wet at all!), I cooked a hearty breakfast at the campsite kitchen, made a big mug of coffee, and started walking. I know that sometimes life demands rushing, but this was not going to be a rushed hike for me. I was content to take my time, stop for photos, and enjoy being in such a beautiful part of the world.
The Day 2 hike had some gentle climbs, but it was a relatively easy day of hiking. After three hours of easy hiking, I arrived in Camp Bay. I set up my tent again, and went for a walk along the shore.
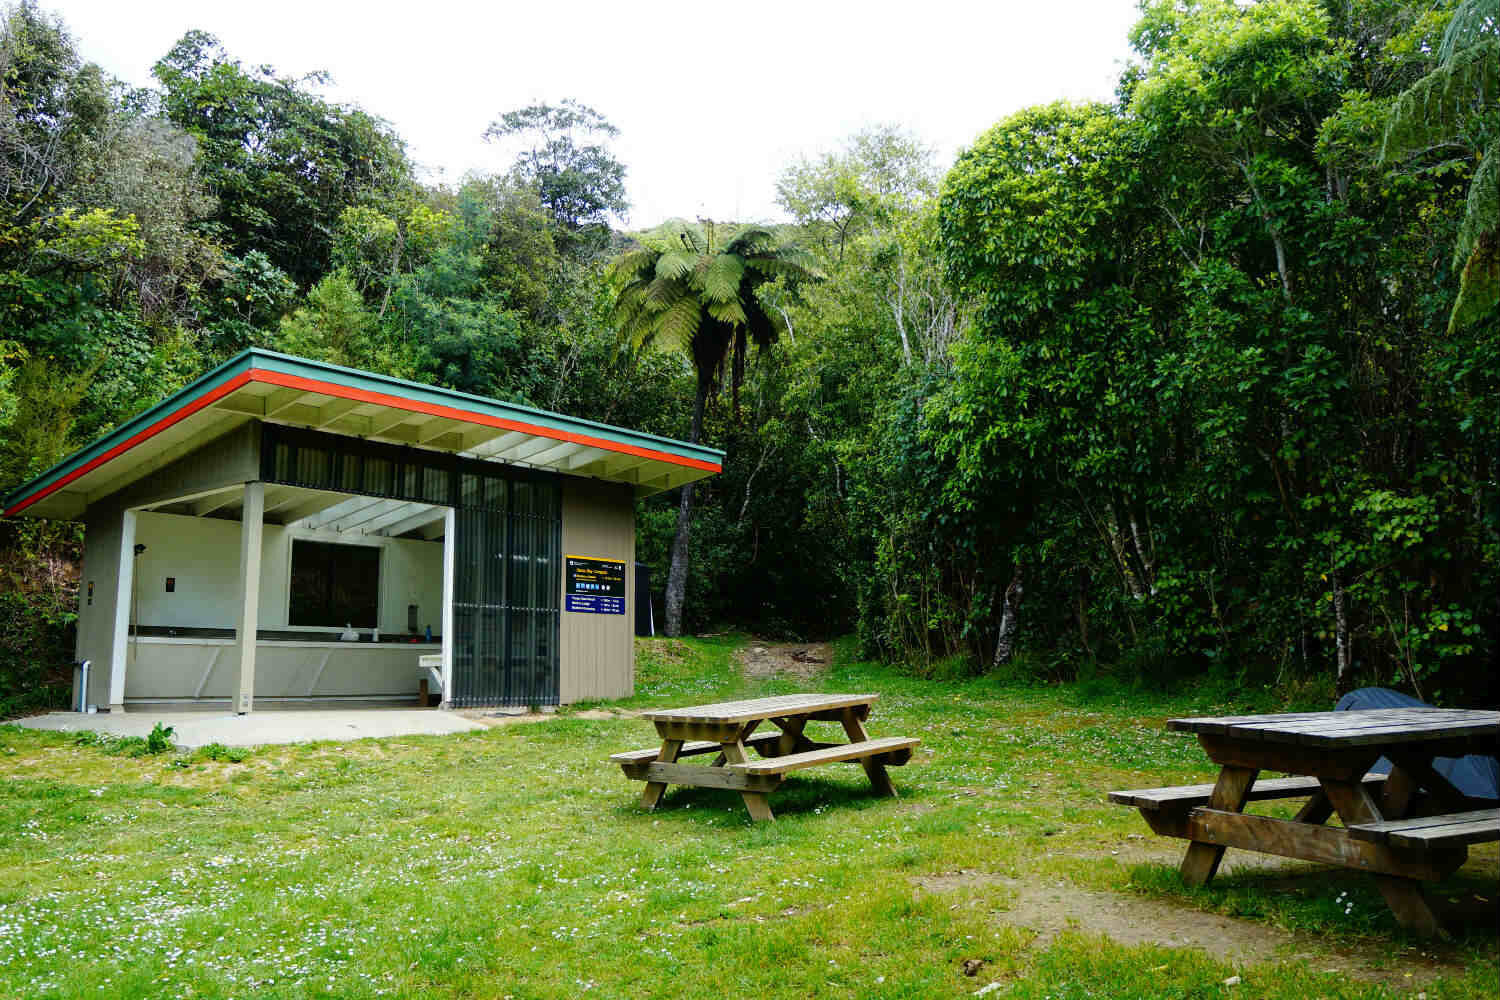
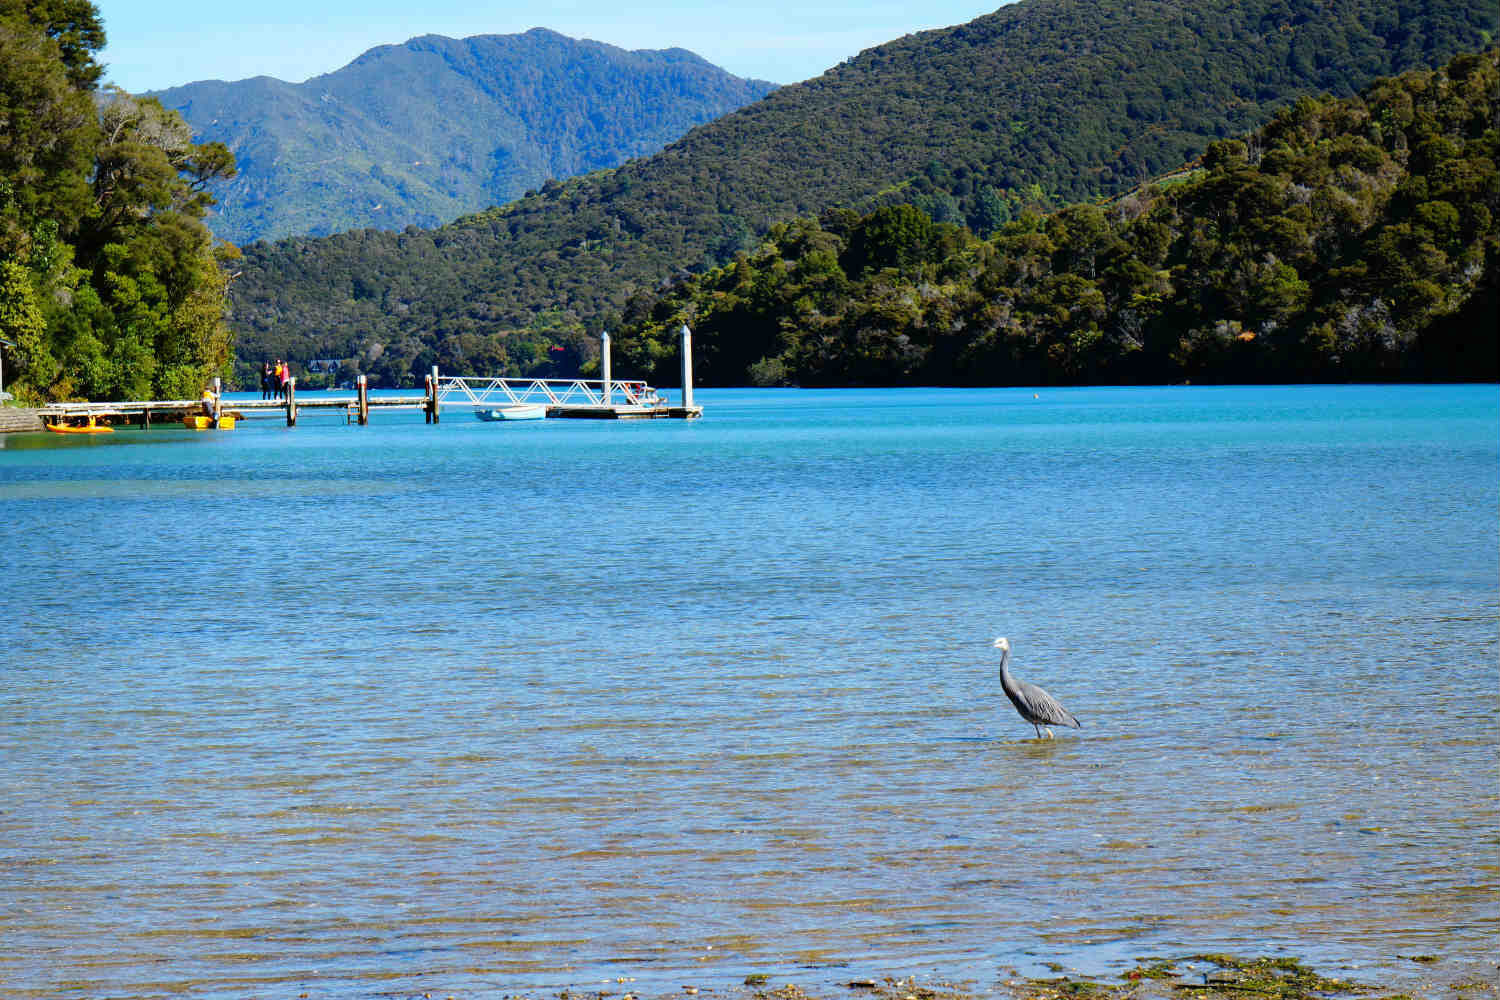
Camp Bay (Department of Conservation) Campsite
The Department of Conservation campsite is located just 5 minutes from Punga Cove, a lodge-type resort with a really nice cafe and restaurant. I hung out in the cafe for a while, chatting to other hikers, enjoying hot coffee, snacks, and comfy chairs. Then I went back to the campsite, did some yoga, read my book, and enjoyed the scenery.
Later that night, three other trampers arrived. They walked from Ship Cove all the way down to Camp Bay (roughly 26kms) in about eight hours! So it definitely can be done – just not by me!
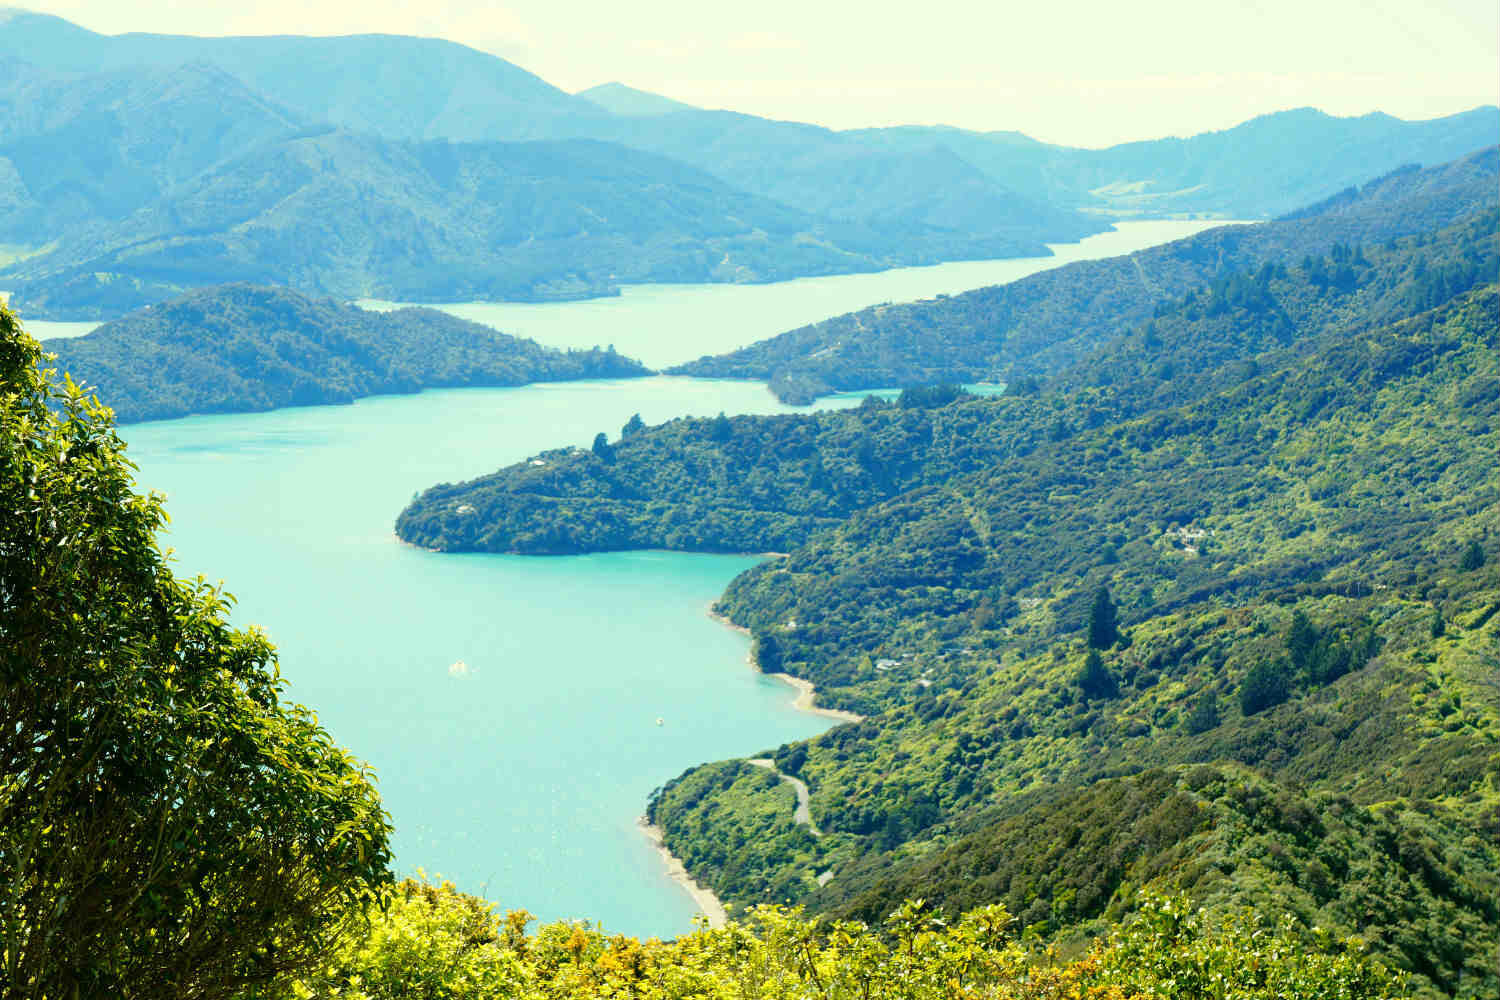
Queen Charlotte Track – Day 3: Camp Bay to Torea Saddle (Cowshed Bay Campsite ) – 23km / 8hrs
It was on Day 3 of the Queen Charlotte Track that I reached the highest altitude section of the track – 400 metres.
I woke up early and it was raining. *sigh* However, it wasn’t too bad. Luckily, the rain stopped in time for me to dry the tent a bit while I made breakfast. Then it was time to pack up and get going again.
It’s this section of the QCT that is supposed to be the hardest because the track is long and steep. However, it also provides some pretty incredible views, so that makes up for it! So in my opinion, this is the best section of the Queen Charlotte Track!
Getting to Cowshed Bay
I arrived in Cowshed Bay at around 6pm and the woman I met on Day 1, Rachel, was there! It was great to see a familiar face and we chatted about our respective treks so far. I met various other people at Cowshed Bay and had a great evening swapping hiking stories, watching the golden sunset over the bay, singing a cappella, and I even saw a shooting star.
Queen Charlotte Track – Day 4: Cowshed Bay to Mistletoe Bay Campsite – 8km / 4hrs
This is one of the last sections of the hike. Many people keep walking to the end but I was enjoying myself and wanted to relish the experience.
Rachel decided to join me for this section of the hike. I love solo hiking, but it was nice to have a friend to share the journey with.
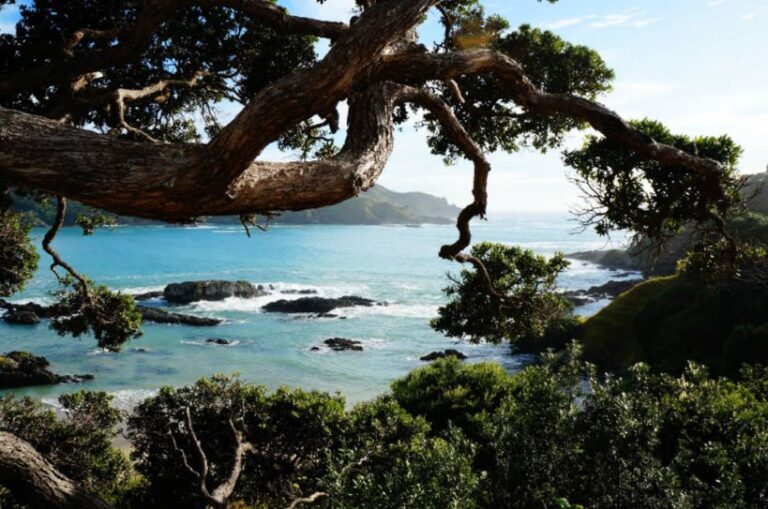
The trek this day ascended to almost 400 metres again. If you look at the map, it looks like quite a steep climb, but in reality, it’s not that bad. After a 3.5 hour hike, I arrived in Mistletoe Bay. This is a private campsite, but I really wanted to stay here because the bay is STUNNING.
Glow Worms in Queen Charlotte Sound
The Mistletoe Bay campsite sits next to a very old beech tree forest, which is quite different from the rest of the Queen Charlotte Track.
By chance, I discovered that there are glow worms just two into the old beech forest! I had never seen glow worms before, and I certainly hadn’t expected to find them on the QCTrack! The glow worms line the walls of a narrow river stream and light up after dark. Just beautiful!
If you head out to see them, please make sure not to disturb them.
Queen Charlotte Track – Day 5: Mistletoe Bay to Anakiwa – 12.5km – 4hrs
We didn’t reach the Queen Charlotte Track from the main road. We walked through the forest for about 40 minutes. It was well worth it as the change of scenery was refreshing. Rachel and I walked as slowly as possible; we didn’t want it to end!
But anyway, we finished the track around noon. Once you get to the DoC sign, you can claim your prize as a multi-day hiker – yay!
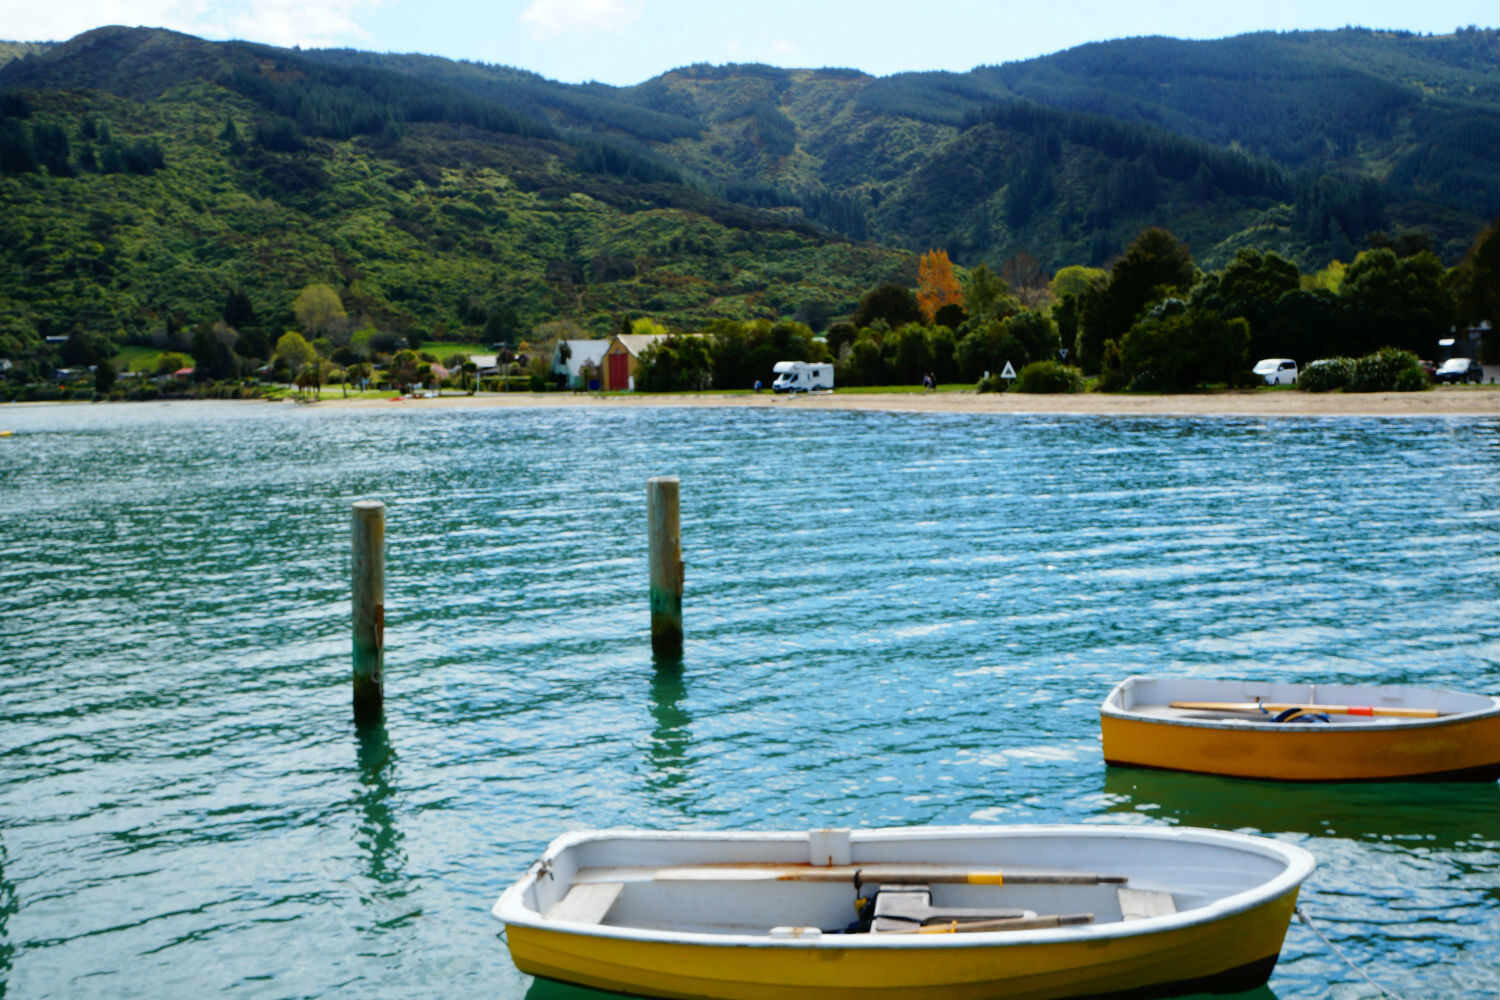
From Anakiwa to Picton
Once in Anakiwa, Rachel and I went our separate ways. She continued her hike onto Havelock, and I waited for the water taxi to pick me up.
The water taxi (the return leg of my pre-paid journey) first went all the way back to Mistletoe Bay before heading onto Picton. The trip took about 45 minutes overall, and it was nice to get a different perspective of Queen Charlotte Sound.
When I got back to the hostel in Picton, I took a well-deserved shower before treating myself to a great hot meal and a glass of wine!
The following day, I took the bus back to Christchurch. I felt really proud of myself and I’m looking forward to more long hikes.
How much does it cost to walk the Queen Charlotte Track?
This is what I spent on the trail. Of course, you can spend a lot more or a bit less, but this should give you a rough idea.
Accommodation
Queen Charlotte Track Campsites
- NZ$15 – Miners Camp
- NZ$10 – Camp Bay
- NZ$14 – Cowshed Bay
- NZ$20 – Mistletoe Bay
Picton
- NZ$78 – 3 nights (2 before the hike, 1 after)
The hostel in Picton that I mentioned earlier was NZ$26 per night. It’s close, cute, comfy, and boasts a fully equipped kitchen. The price includes breakfast, but I didn’t find it satisfying, so I suggest you make other arrangements. On the other hand, they serve apple crumble with ice cream every night, which gives the hostel a friendly vibe.
Transport Christchurch to Picton
NZ$56 – bus Christchurch – Picton, return.
Food
NZ$80-$100 – food and snacks for five full days of hiking.
For some great camping cooking ideas, check out this easy vegan camping meals article. I’m not vegan or vegetarian but veggies are my jam – enjoy!
Queen Charlotte Pass
NZ$18. Purchased from the Picton I-site.
Transport Picton to Ship Cove/ Meretoto
NZ$119 – Beachcomber water taxi, return.
Actually, when I got to Picton I was kind of hoping to find a cheaper option, but I couldn’t! If you know of any cheaper options, please will you share intel in the comments below?
So all in all, it cost me $415 for five days/ four nights. Was it worth it? Absolutely!! I’ve got tonnes of memories, met great people, saw a gorgeous part of the world, tested my camping skills, and got a great workout!
If you wanted to save some money, you could arrive in Picton on the morning of the water taxi across to Ship Cove. That would save the Picton accommodation costs. You could also save a few dollars on your food for the hike costs, if you wanted to.
On the flip side, if you wanted some luxury at the end of each day of hiking, you could stay in lodge-style accommodation. I’d like to try that next time. There are also pick-up and drop-off services for hiking packs that you could look into if you didn’t want to carry all your gear each day.
The best part of the Queen Charlotte Track
I loved the whole trip, but if I was forced to choose one ‘best’ day, I’d say getting to the highest point. It felt like being on top of the world! I felt great that I’d hiked up there, and was rewarded with spectacular views. However, I also really loved Mistletoe Bay Reserve. If time allows, I definitely recommend hanging out there for at least an afternoon. It’s beautiful and really peaceful.
Did you know…?
Some really gorgeous spots along the Queen Charlotte Track can be accessed by car. For example, Cowshed Bay and Mistletoe Bay. So if you’re pressed for time, try driving into those areas and doing a short hike. I highly recommend it!
Summary of Hiking the Queen Charlotte Track
What an incredible adventure it was to hike the iconic Queen Charlotte Track in New Zealand! Over five days and four nights, I hiked through some of the most stunning landscapes I’ve ever seen, from lush native forests to breathtaking coastal views. Every step of the 70km track offered something new and exciting, making this trek an unforgettable experience.
The journey began at the historical Ship Cove with its vibrant birdlife and gorgeous views. I was lucky to have (mostly!) good weather and great accommodation. I also met some really awesome people and loved the camaraderie of fellow hikers – chatting along the route and at the campsites after a long day of hiking.
The final stretch to Anakiwa was a bittersweet end to this adventure. While my legs were tired, my spirit was soaring. I felt really proud of myself to have done a long hike mostly on my own, but also a little sad that the journey was almost over.
Hiking the Queen Charlotte Track was a magical experience, full of natural beauty, physical challenges, and new friendships. I left with a heart full of memories and a promise to return to this breathtaking corner of New Zealand. If you’re looking for an epic hike, the Queen Charlotte Track should be at the top of your list!


Thanks for the detailed article Belinda. Lots of helpful info.
We are planning to go (from Australia) in February 2026. When did you go?
Thanks for the glowing review of our home country too, sounds like you’ve seen more of it than we have!
I have travelled independently and with other friends in many parts of the world. This will be the first country where I may have to pay to go for a walk in a beautiful place. In my country you can walk everywhere for free. The ferry taxi seems crazy expensive. Having to pay a tax to walk seems crazy.
Hi Gerry. Thanks for your feedback! I understand not being happy about paying to hike. However, it’s not uncommon in Australia & New Zealand to pay a fee to access National Parks; the fees help pay Park Rangers’ salaries and pay to keep amenities like toilet blocks clean and functioning. The water taxi cost IS expensive, I agree. I wish I could find a cheaper alternative!
have you been to Australia? What is the most scenic area?
scenery is thin on the ground there?
Yes, I have! Australia has loads of stunning scenery, and because the country is so vast, the scenery changes depending on where you are. I’ve travelled all down the East Coast of NSW. I’ve spent a LOT of time in the state capital cities of Sydney, Brisbane, and Melbourne, as well as the national capital, Canberra (where there is more to do than you might expect!). I’ve explored the Great Ocean Road in Victoria, and over in Western Australia I’ve driven from Fremantle up to Monkey Mia. Spectacular! I’ve also spent some time in Tasmania and – oh wow! – it’s gorgeous down there. Some Australian highlights include the Great Barrier Reef (for snorkelling, scuba diving, and exploring the expansive beaches), Sydney and surrounds (including the Blue Mountains and scenic South Coast), Melbourne’s food and nightlife, Australia’s dramatic ‘red centre’ (Uluru), and the spectacular WA coastline.